No Conveyor Belts — Then How Do Things Move?
Outworld Station’s biggest feature (and biggest learning curve) is this: there are no conveyor belts.
If you’ve played Factorio, you know the pain of spending hours routing belts. This game cuts that entirely. Instead, it uses “invisible logistics pipes.” I spent my first 20 minutes looking for the conveyor belt button before I realized: there isn’t one. By design.
The One-Sentence Explanation
Invisible logistics = automatic inventory matching between producers and consumers. You don't lay pipes. You just tell the system "ore goes from here to there" and it handles the transport.
Chapter 1: How Invisible Logistics Works
What Is an Invisible Logistics Pipe?
Traditional factory games use conveyor belts, pipes, or drones. Outworld Station uses direct inventory links:
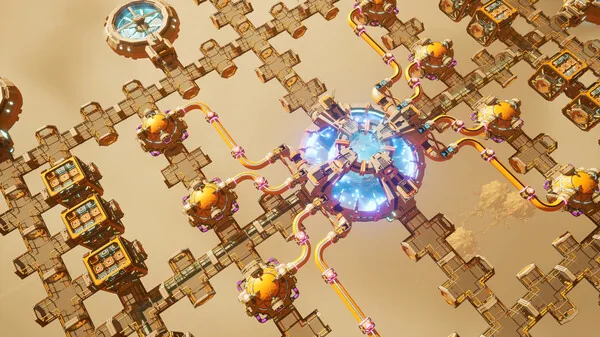
When you link Building A’s Output to Building B’s Input, the game creates an invisible logistics channel between them. No space taken. No maintenance needed.
Why this is great:
- Saves space — no belt corridors needed
- Easy to reconfigure — just re-pair, no deconstructing
- Self-regulating — downstream stops, upstream just buffers
The downside (what you’ll struggle with):
- You can’t see the flow — debugging is harder
- Distance limit — you’ll need relays for long hauls
- Easy to forget pairing and wonder “why isn’t my factory doing anything”
The Pairing Operation (What You Actually Need to Remember)

- Left-click a production building (say, a Smelter)
- In the popup, click the Inventory tab
- Scroll down — there’s a Pair button under Output. Click it.
- Mouse over the target storage container or consumer building. Left-click to confirm.
- Pairing done — you won’t see a pipe, but materials are flowing.
Pro shortcut: Hold Shift while clicking Pair to auto-pair to the nearest compatible building. In dense factory areas this is 10x faster than manual targeting. Found this at hour 3. Wish I'd known sooner.
Pairing Limits
| What | Limit | Workaround |
|---|---|---|
| Max output links per building | 4 | Add relay buildings if you need more branches |
| Max input links per building | 6 | Can be upgraded on higher-tier buildings |
| Max link distance | 200 units | Build a Logistics Relay beyond that |
| Single link throughput | 15 units/sec | Research Logistics tech to increase |
Chapter 2: Storage Management (The Overlooked Critical Skill)
Three Storage Modes
Every Storage Container has three modes (click container → Mode tab):
- Buffer Mode — Default. Balanced in/out. Works for most situations.
- Priority Output — Ships everything out ASAP. Good for transit depots.
- Reserve Stock — Hoards materials, won’t export. Perfect for emergency supplies.
My Storage Layout
| Production Stage | Containers | Mode | Why |
|---|---|---|---|
| Raw material intake | 2 | Buffer | Balances drill output with smelter demand |
| Intermediate processing | 1 | Buffer | Buffer between processing steps |
| Final products | 1 | Priority Output | Feeds advanced production lines first |
| Critical materials (uranium, alloys) | 1 | Reserve Stock | Insurance against supply chain breaks |
Chapter 3: Cross-Planet Logistics — Using Wormholes
Wormholes Are Your Supply Chain, Not Just Teleporters

Once you have a second station (or an outpost on another planet), you need wormholes to link inventories across planets.
How to set it up:
- Build a Wormhole Generator at each location
- Set both generators to the same channel number (say, channel 1)
- They auto-connect — inventories merge across both locations
- Now do Inventory Pairing across the wormhole link — the system handles interplanetary transport
Three Wormhole Layouts
Setup 1: Resource Planet → Processing Planet (early game) Put drills and ore storage on the resource planet with Priority Output mode. Ore automatically flows back to your main station. Simplest and most reliable.
Setup 2: Specialized Planet Cluster (mid game) Planet A makes circuits → Planet B makes armor → Planet C does final assembly. Great for long-term operation, but don’t try this early — you’ll overwhelm yourself managing three planets at once.
Setup 3: Armed Outpost (defense) Set up a fortified outpost on hostile territory. Your main station sends supply shipments through the wormhole. Useful once enemies start hitting harder.
Wormhole Upgrade Cadence
0-2 hours: Planet-internal logistics only. Don't touch wormholes yet.
2-8 hours: Build 1-2 Lv1 wormholes to the nearest resource-rich planet.
8+ hours: Upgrade to Lv3 wormholes, build a 3-4 planet logistics network.
Opening wormholes early = opening a can of worms. Get your home planet stable first.
Chapter 4: Efficiency Optimization — Don’t Chase Perfection
How to Find Bottlenecks
Actual output = slowest node × number of nodes
Example: 3 Mining Drills (5/sec each) → 2 Smelters (7/sec each)
- 3 drills theoretically produce 15/sec
- But 2 smelters can only process 14/sec
- Actual output = 14/sec — bottleneck is the smelters
Fix: Add 1 more smelter or upgrade to Advanced Smelter.
My Production Philosophy
100 hours of experience talking: Don't chase perfect ratios. Build slight overcapacity into every stage. Surplus stock builds up naturally, and when you expand downstream, you don't need to rebuild upstream. Overcapacity = flexibility. The secret isn't perfect ratios — it's redundancy.
Boost Production
- More drills
- Smelter → Advanced Smelter upgrades
- Logistics II research
Reduce Consumption
- Research Efficiency module tech
- Higher-quality ore = less waste
- Proper buffering = fewer stoppages
Common Automation Questions (Pulled from Steam Discussions)
Q: Inventory Pair didn’t do anything?
Check distance. Beyond 200 units you need a Logistics Relay. Also check power — unpair buildings show greyed-out Pair buttons.
Q: My production line keeps stuttering?
Almost certainly upstream starvation. Check raw material storage. If the ore bin is empty, either you don’t have enough drills or the current mine is depleted. Drill spots deplete over time — you need to move them.
Q: Pairing multiple outputs — everything goes to one place?
Default pairing distributes randomly. To control flow, set the receiving container to Priority Output mode — it’ll grab whatever it can.
Q: Wormhole power consumption too high?
Wormholes themselves use modest power (5-15 power/sec). The real drain is cross-planet logistics pipes. Tip: wormhole-connect storage containers only, not production buildings directly. Let the containers handle local pairing.
Q: How many Logistics Relays do I need?
As few as possible. Plan your production layout to keep things within 200 units. Adding relays eats space and makes later reconfiguration painful. I once had to tear down 15 relays and it took half an hour.
Q: How does multiplayer handle logistics?
Each player has independent inventory but shares pairings. Meaning your teammate’s buildings are pair-able. The downside is two people can fight over the same output line. Best to divide and conquer — one person per production line.
One Sentence to Remember
Always build slight overcapacity. Always keep a buffer. As long as materials are flowing and nothing is jammed, your bottlenecks aren’t emergencies — they’re future optimization projects. Keep the factory running first, optimize later.